There have been times when I wanted a really simple file upload mechanism in my Angular 1.x apps. HTML standards provide a simple input button for file uploads. Not only is this typically not easy to style, like making it appear to be a Bootstrap button, it doesn’t lend itself to a stateful JavaScript framework like Angular. However, it’s possible to achieve the desired result with an Angular directive that wraps the standard HTML mechanism.
First things first. The HTML file upload input has to have all of its styles removed so that we’re left, essentially, with only its text label. One this is done, the HTML input must be wrapped within an element to which styles can be applied. I generally wrap the HTML input within a span and then apply the Bootstrap styles to the span in which I am interested.
.btn-file {
    position: relative;
    overflow: hidden;
}

    .btn-file input[type=file] {
        position: absolute;
        top: 0;
        right: 0;
        min-width: 100%;
        min-height: 100%;
        font-size: 100px;
        text-align: right;
        filter: alpha(opacity=0);
        opacity: 0;
        outline: none;
        background: white;
        cursor: inherit;
        display: block;
    }
And if our HTML mark-up now looks like this:
<div class="form-group">
    <label>Select files to upload</label>
</div>
<div class="form-group">
  <span class="btn btn-primary btn-file">
      Browse.. <input type="file" accept="application/vnd.openxmlformats-officedocument.spreadsheetml.sheet, application/vnd.ms-excel" />
  </span>
</div>
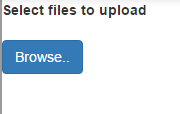
We get a nice Bootstrap button for our file uploader:

For the Angular portion of handling an intercepting the file upload selection and management, I created a directive called “uploadFiles.” This is attached to the HTML input:
<input type="file" accept="application/vnd.openxmlformats-officedocument.spreadsheetml.sheet, application/vnd.ms-excel" upload-files="vm.files" has-files="vm.hasFiles" />
Note that the directive takes two attribute inputs. One is the two-way bound model that is used to track files that have been selected and the “hasFiles” property is used as an easy way to check when any there are selected files. I used this because them it becomes an easy way to determine if other actions can be performed.
The directive itself is relatively simple:
var uploadFiles = function () {
    var directive = {
        link: function (scope, element, attrs) {
            var changedHandler = function () {
                scope.$apply(function () {
                    if (element[0].files) {
                        scope.files.length = 0;
                        angular.forEach(element[0].files, function (f) {
                            scope.files.push(f);
                        });
                        scope.hasFiles = true;
                    }
                });
            };

            var resetHandler = function () {
                scope.$apply(function () {
                    scope.files.length = 0;
                    scope.hasFiles = false;
                });
            };

            element.bind('change', changedHandler);

            if (element[0].form) {
                angular.element(element[0].form).bind('reset', resetHandler);
            }

            // Watch the files so we can reset the input if needed
            scope.$watchCollection('files', function () {
                if (scope.files.length === 0) {
                    element.val(null);
                }
            })

            scope.$on('$destroy', function () {
                element.unbind('change', changedHandler);
                if (element[0].form) {
                    angular.element(element[0].form).unbind('reset', resetHandler);
                }
            });
        },
        restrict: 'A',
        scope: {
            files: '=uploadFiles',
            hasFiles: '='
        }
    };

    return directive;
};
The premise is straight forward. The HTML input’s change event indicates that files have been added or removed. We can hook into this event to pass the list of files to our own array and update the flag that indicates that files are selected. The form, if there is one, could also potentially be reset, which means we have to handle any form’s reset event too.
To illustrate, I show/hide a div when we “hasFiles.” Using an ng-repeat, it is easy to show all of the selected files. An upload button can be used to initiate the upload of the files and a cancel button (input) of type “reset” can reset the form to clear the selection.
<div class="form-group" ng-show="vm.hasFiles">
    <ul class="list-unstyled">
        <li>
            <strong>Files:</strong>
        </li>
        <li ng-repeat="file in vm.files" ng-bind="file.name" />
    </ul>
    <input class="btn btn-primary" type="button" ng-click="vm.uploadFiles()" value="Upload">
    <input class="btn btn-warning" type="reset" value="Cancel">
</div>
The plunk below shows the JavaScript and HTML working together. I’ll have another follow up post showing how to process the the files using a FormData object and uploading them to a WebAPI endpoint.
